Tifa Lockhart is a fan favorite of the Final Fantasy series. This tutorial will show you how to cosplay in her Final Fantasy VII: Advent Children outfit. All cosplays are made with the intention of keeping costs low and maximizing comfort, since a majority of cosplays are worn during crowded conventions.
Materials:
- 2 to 3 yds. of black material of your choice. Costume leather would be the most accurate material, but since it is so costly and traps heat, I chose woven cotton.
- A zipper that will be the length of your top. I chose a zipper that was 9 inches long since that is where I wanted the length to sit.
- Three large, black buttons.
- Black thread.
- Enough elastic to sew a waistband.
Tifa’s Shorts
We will first start off by drafting a pattern for her shorts. You can skip this step if you would rather buy a pair of shorts that are the length and color of hers. To draft the pattern, you will need a pair of pants that fit you well and some paper. I used a pair of pajama pants and traced it on the white side of an old poster. Start by folding the pants on the front seam and trace around it. Leave a bit of room on the top since we are going to sew a waist band into the shorts. The length of the pattern will be whatever length you want for your shorts. Cut out the shape.
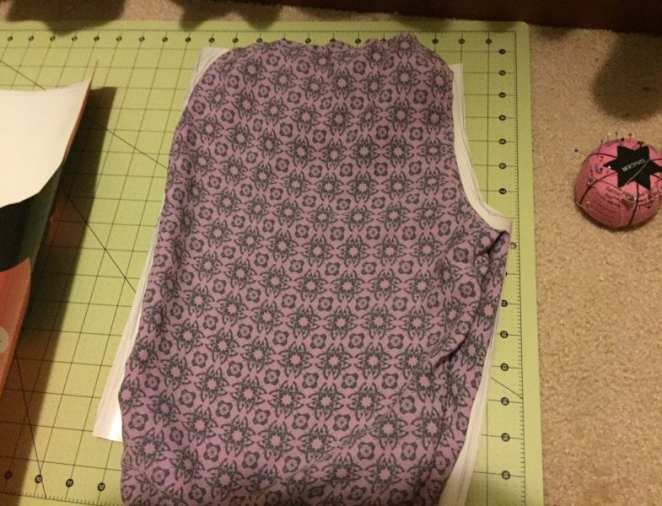
Repeat this step with the fold on the back seam until you have a traced a shape of the front seam of the pants and the back seam of the pants.

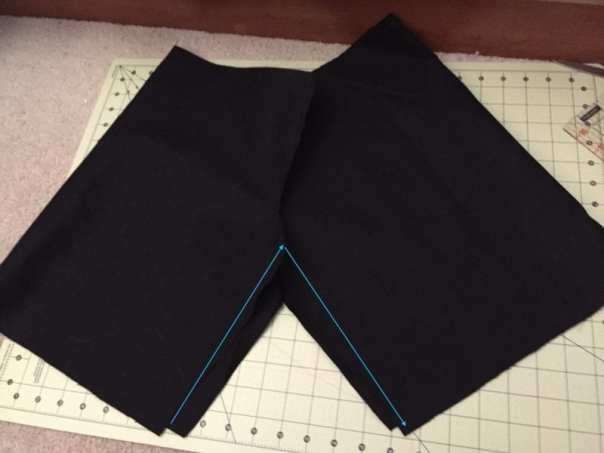
Flip the back seam shape over so the two long sides of the pattern are touching, with no gaps. Push the long sides of pattern together until you get a shape like this. I used a poster for my pattern. If you used an old poster, as well, then one of your shapes will not be white when flipped over.
Cut your fabric around the pattern with a rotary cutter, or use scissors. Make sure you leave room for seam allowance, meaning space between the fabric edge and your line of stitches. Cut two identical shapes. When you have the two shapes, lay them on top of each other with their right sides facing together, and sew along the curved part. (Sew where the blue lines are.)
When that is done, you will grab the top of the pants and open it so the newly sewed seams are in the middle. When you do this, there should be a shape that looks a lot like shorts. Sew up the crotch of the shorts.
Sew a waistband into the top of the pants.
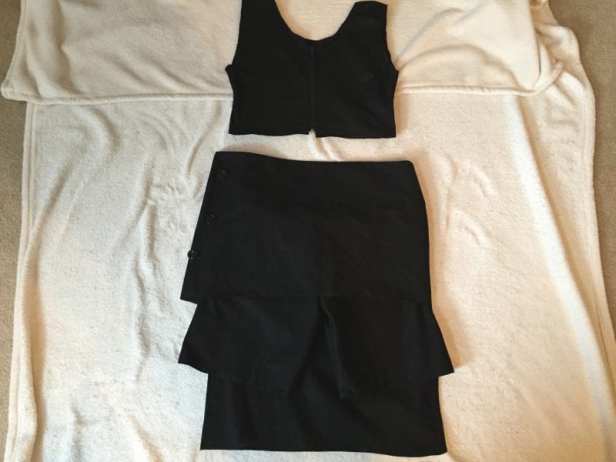
Tifa’s Top
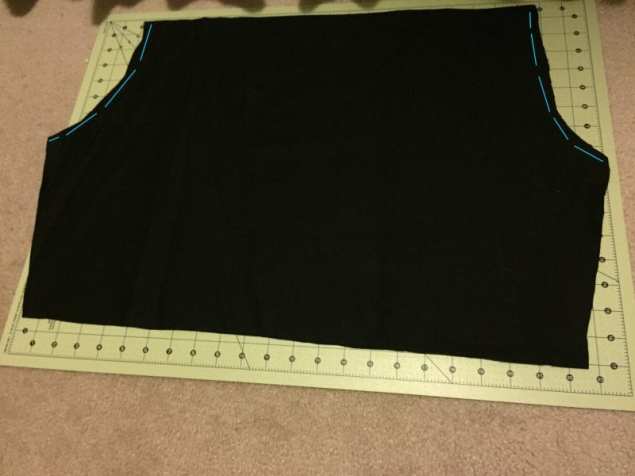
Next, we are going to work on her top. Start by finding a tank top that fits you well and laying it atop the fabric.
Fold the bottom of the tank top so it will be the length that you want for your finished top. I bought a zipper that was 9 inches long, so I folded the tank top until it was 9 inches from the bottom of the neckline to the bottom of the top. I added a centimeter of length so it wouldn’t be too short when it is time to finish up the raw edges.
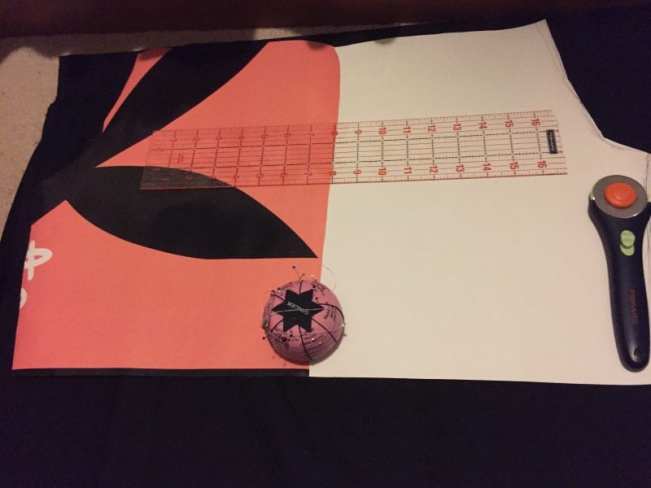
When the length of the neckline to the bottom of the top is the length of your zipper, cut on fold (resulting in a half pattern) leaving some room for seam allowance. Then, cut two more pieces not on fold (resulting in a full pattern. Until you have two pieces for the front of the top and one piece for the back. Sew a zipper in between the two pieces to connect them.
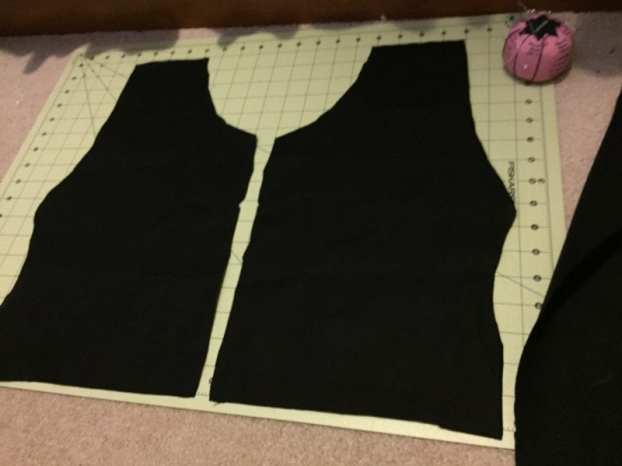
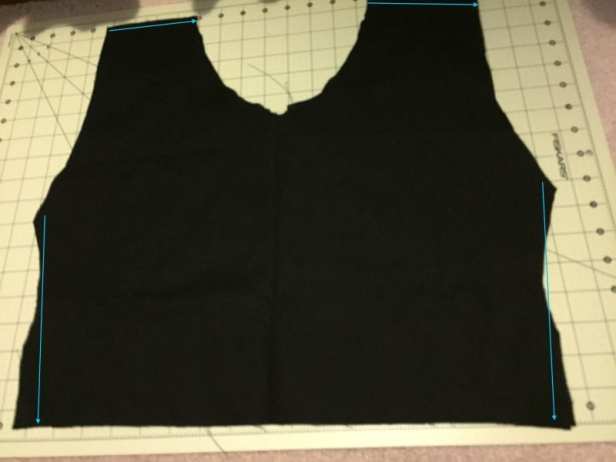
Next, lay the back piece over the front piece, right sides facing together. Sew the top of the shoulders and up sides. (Sew where the blue lines are)
Tifa’s Skirt
Moving on to the the A-line cut skirt she wears. To start, decide how long you want the front and back of the skirt to sit. I marked how long I wanted the front to be based on the length of my shorts, for example. The front of the skirt should be shorter than the shorts and the back should be longer.
Once you decide the length of both pieces of fabric, decide the width. The width of each individual piece should be half the width of your waist, leaving room for seam allowance. The width of both pieces should add up to the width of your waist. Add about 3 inches to whatever measurement you decided for the front piece of the skirt so we can add buttons. Lay the front of the skirt over the back of the skirt, right sides facing together. Sew up one side where they overlap.
Mark on the skirt where you want the buttons to be. The buttons will be on the front piece (the shorter piece) and the button holes should be on the back piece of the skirt (the longer one)

Once you sew on the buttons and make the button holes, just put the finishing touches on the piece by finishing up all of the raw edges, getting a red ribbon to tie around your upper arm, and use the remaining pieces of fabric to make ties around the legs. Your Tifa Lockhart from FF7: Advent Children outfit is finished!