War Thunder is a military game all about working together with your teammates to blow up your opponent’s tanks, planes, and naval units. If you’ve found your way onto this page, you’re likely wondering how to mark enemies in War Thunder, so you can communicate more effectively with your teammates to get the upper hand. Here’s everything you need to know to do just that.
What Does Marking an Enemy Do?
Marking an enemy makes the target visible to you and your squad by placing a yellow marker on their location. This can only be seen by your squadmates, which will be highlighted in green on your team.
Your blue teammates won’t see the marked enemy, so keep this in mind when communicating with the rest of your team.
How to Mark an Enemy in War Thunder
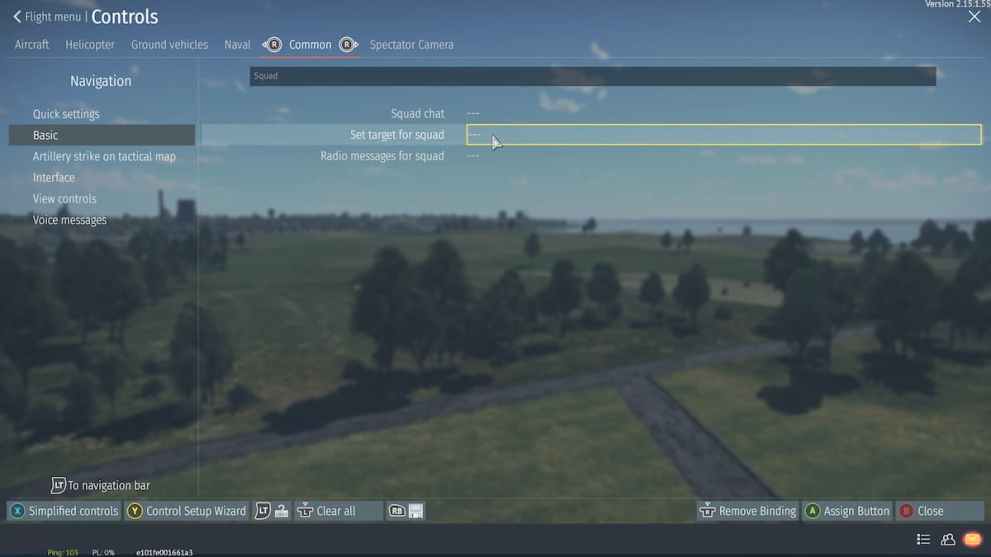
To mark an enemy, you’ll need to assign a key or button input for ‘Set target for squad’ control in the game’s settings.
This can be changed by going into your ‘Controls’ menu and then selecting ‘Common.’ You can then enter ‘Squad’ in the search bar at the top of this menu screen and then ‘Set target for squad’ option should appear.

Double-click on it and then you can press any key or mouse input that isn’t already assigned to something to change its keybind. If you want to assign it to an input that is already bound to another action, you can do so, but you’ll then need to change the binding for the action you’re replacing.
Once you’ve assigned the ‘Set target for squad’ to a particular key or button, simply point your reticles at what you want to mark in a game and press the assigned button. This will place a yellow marker on the enemy for your squad to see.
That’s everything you need to know about marking enemies in War Thunder. For more tips and tricks be sure to search for Twinfinite.
