
At the very beginning of Cyberpunk 2077, you’ll unlock the ‘Beat on the Brat’ quest. This sees you taking on a number of different street brawlers in a fist fight. In this guide, we’ll talk you through each of the fights, providing you with a recommended level and some tips on how to beat each of the opponents in your way before the final fight against Razor.
How to Complete ‘Beat on the Brat’ in Cyberpunk 2077
First things first, let’s run you through quick handy tips that’ll help you in each of these fights.
First and foremost, if you can afford it, get the Gorilla Arms cyberware upgrade from a Ripperdoc. We’ve got a detailed guide on the best Gorilla Arms build if you want to lean into this playstyle, but it’ll also come in clutch during Cyberpunk 2077’s Beat on the Brat quest.
Your effectiveness in fist fights can be improved by increasing your Body attribute, as this will increase your health and stamina. On top of that, you’ll want to get the Invincible and True Grit perks from the Athletics skill tree, and Flurry, Crushing Blows, Efficient Blows, Rush, Relentless, and Dazed from the Street Brawler skill tree.
You’ll also want to make sure that you’re making use of the counter-attack. To do this, you must block at the very last second within the final frames before your opponent’s attack lands. This will stun your opponent and block their attack, leaving them open to a few easy hits. Use this to your advantage to cheese your way through fights if needed.
With these perks (and tips) under your belt, you should find these fights far, far easier than they first seemed. Now, let’s get right into the fights.
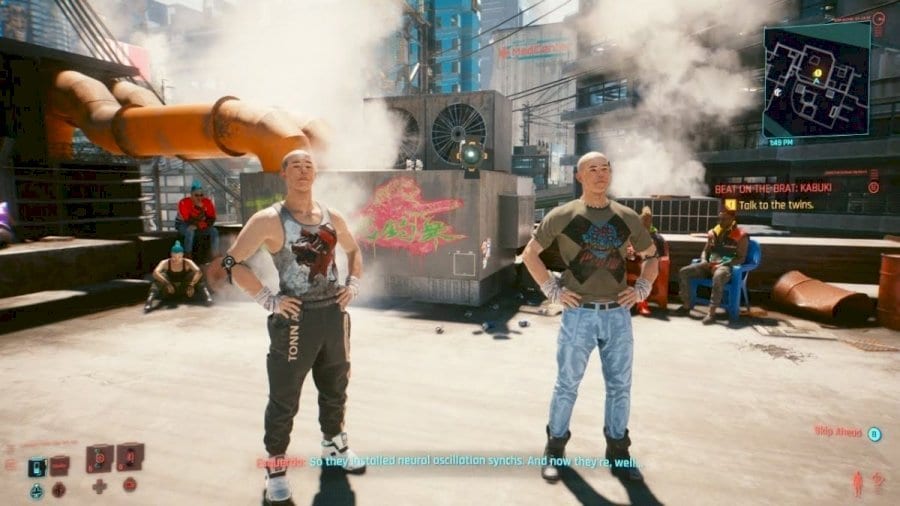
Kabuki Twins
- Recommended Level: 5
The twins on the rooftop in Kabuki are your first fight. They should be the easiest, but they can prove a challenge if you don’t know how to eliminate their 2 v 1 advantage.
What you want to do here is constantly be on the move. Whenever one of the twins goes in for an attack, use your counter to stun them and get a few quick hits in.
Also, try and make sure you’re moving in such a way that one twin gets in the way of the other, so you can just focus on one at a time. Don’t get overzealous when you’re landing your hits, too. Once the twins start landing hits on you, your health will quickly diminish before you’ve got time to recover.
In summary: keep moving, counter, get a few hits in, retreat, and go again.
Buck – Cyberpunk 2077 Beat on the Brat Guide
- Recommended Level: 22
As long as you’re around level 20 or higher, you shouldn’t have too much of a problem against Buck. With just one enemy to focus on, you can wait for him to attack, counter, and deliver a ton of blows in while he’s stunned.
If Buck starts to land hits on you, remember you can always use dodge (double tap B/ Circle) to quickly get to safety.
Side Note: Before the fight against Buck, you can actually get him to put his sniper rifle on the line. If you do this and win, he’ll set his cronies on you. Kill the enemies and pick up the sniper rifle. If you don’t ask him to put the sniper in, you’ll be able to walk away without getting into a fight when you win, but you won’t get the weapon. The choice is yours.
César
- Recommended Level: 30
Another relatively straightforward fight, César is your opponent in the Glen area. Make sure you’re using your counters and dodging as and when you need to.
The important thing to know about the César fight is you can get him to put his car on the line. After beating him, you can choose to let him keep his car or the money or even both if you’re a kind-hearted fist fighter.
If you choose to let him keep one of the two, he’ll show up later in this quest and offers a special interaction that we won’t spoil for you.
Rhino – Cyberpunk 2077 Beat on the Brat Guide
- Recommended Level: 32
Rhino is the Champion of the Animals you’ll have to fight in the Rancho Colorado arena. If you’ve completed the ‘For My Son’ quest without killing everyone, you can walk in and talk to Rhino.
If you haven’t, you’ll need to either pay the bodyguard, intimidate him by passing the Body attribute check, or by sneaking in through the shutters by the red containers on the northeast side of the arena.
If you completed ‘For My Son’ and killed everyone, Coach Fred will give you a call and grant you an automatic win because… well… there’s no opponent.
In the fight itself, Rhino will try and make light work of you by charging at you and then throwing punches over and over until you go down.
The best way to counter this is to dodge out of the way when Rhino charges at you, get up behind her, land a few punches, and then retreat. Let her charge at you again and rinse repeat until she goes down.
Ozob (Optional Fight) – Ticking Time Bomb
- Recommended Level: 30
- Requirements: Complete ‘Send in the Clowns’ side job
The Ticking Time Bomb optional objective sees you heading to Pacifica to fight Ozob, but you’ll need to have completed the ‘Send in the Clowns’ side job and wait a couple of in-game days for it to unlock.
Ozob’s actually pretty easy to beat. His attacks are very strong, but he’s also slow, meaning your dodge is going to come in clutch here. Wait for Ozob to attack and either counter or dodge around to the back of him. Land a few punches and then retreat.
Be sure to watch out for the grenade on his nose, too. Once you land a few punches on Ozob it’ll detonate and it’ll deal massive damage if you’re too close. Keep your distance as soon as you’re done landing hits.
The main thing here is to just take your time, keep your patience and slowly whittle Ozob down. If you give him an opportunity to land an attack or two, it won’t be long until the fight’s over… and not in your favor.
Razor Final Fight – Cyberpunk 2077 Beat on the Brat Guide
- Recommended Level: 35
- Requirements: Beat Previous Four Fighters
- Complete ‘Transmission’ main quest
The final fight in Cyberpunk 2077’s Beat on the Brat quest is against Razor, and this is a tricky one.
First off, you need to make your way to the Pacifica Grand Imperial Mall and wait on the bench. Then talk to Coach Fred by the ring, who will suggest you throw the fight and earn twice the amount of Eddies. Choosing to do this will earn you the extra money, but less Street Cred than if you choose to beat Razor and become the champ.
To beat Razor, you need to keep moving, wait for him to throw a punch, and then counter it. When he’s stunned, get a few punches in and then retreat. It’s a similar method to the previous fights, but you can make light work of Razor by focusing on his weak spot — his abs.
This is why we’d avoid dodging round the back of Razor and instead focus on countering and stunning him. Either way, take your time and make sure you seal the deal with a final blow.
And with that, you’ve beaten the Cyberpunk 2077 Beat on the Brat quest guide. Check out our guide wiki for more on Cyberpunk 2077, or see more of our coverage below.