One thing you’ll likely find yourself doing a fair amount in Animal Crossing: New Horizons is planting trees. Be it a normal Cedar Sapling, a fruit tree, or money tree, you’re going to be doing it a fair bit. A lot of these also grant you ways to make easy Bells, but you won’t want to plant them and have them die. Our Animal Crossing: New Horizons tree spacing guide will talk you through what you need to know.
Tree Spacing in Animal Crossing New Horizons
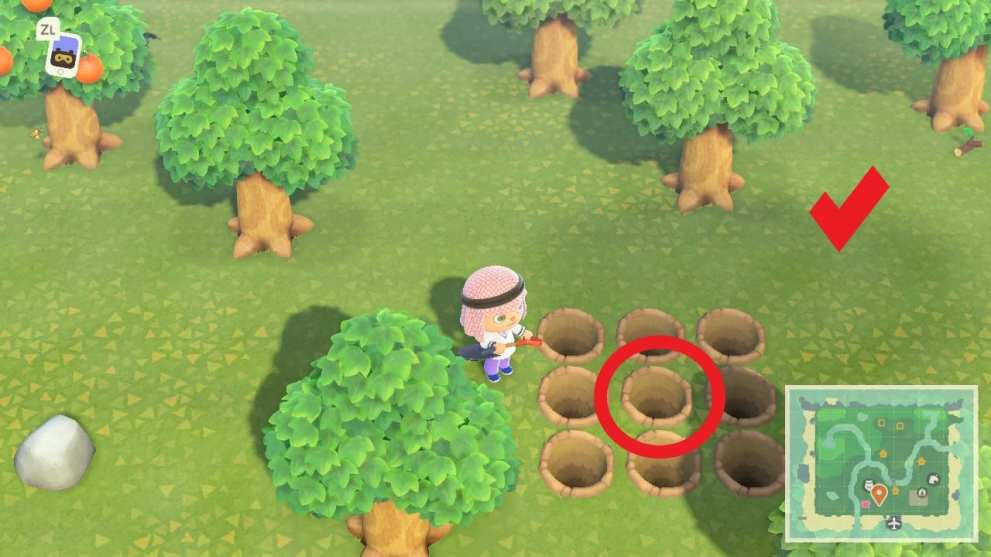
To put this simply, when planting a tree, you’ll want to make sure there is nothing immediately next to it. To check this, you should be able to dig eight holes with your shovel all the way around where you want to plant the tree.
In other words, you’ll want a 3×3 grid of holes, and then to plant the tree in the very center hole to ensure your tree spacing is perfect. You can see an example of this in the screenshot below.

It’s worth noting that it’s not just other trees that can be an obstacle you need to navigate when it comes to tree spacing. As shown in the screenshot below, the rock right next to the center hole would stop a tree from growing here.

Absolutely nothing should be in the immediate vicinity around where you’re wanting to plant the tree. This includes bodies of water, rocks, buildings and flowers.
Keep in mind that trees do take a few days to grow to full size and begin bearing fruit or bags of Bells if you planted a fruit or money tree.
That’s everything you need to know about tree spacing in Animal Crossing: New Horizons. Head over to our wiki for more tips and tricks, search for Twinfinite, or check out more of our coverage below.
