Ethan Winters made his debut as a new series protagonist in Resident Evil 7, and he’s making a return in Resident Evil Village as well, where the story picks up three years after the incident at the Baker estate. This time around, he’s dealing with vampires and werewolves, but the core gameplay loop still remains the same as you’ll have to scrounge up items and resources to survive. Here’s how to craft items in Resident Evil Village.
Crafting Items in Resident Evil Village
It’s a little different from the item combination system in earlier games in the series, but it follows the same concept: gather specific resources, then combine them to form an item that will be far more useful to you.
In Resident Evil Village, you’ll come across a variety of different resources like scrap, gunpowder, and chem fluid. On their own, they don’t seem to have much use. But if you combine them, you can craft items like first aid meds and ammo.
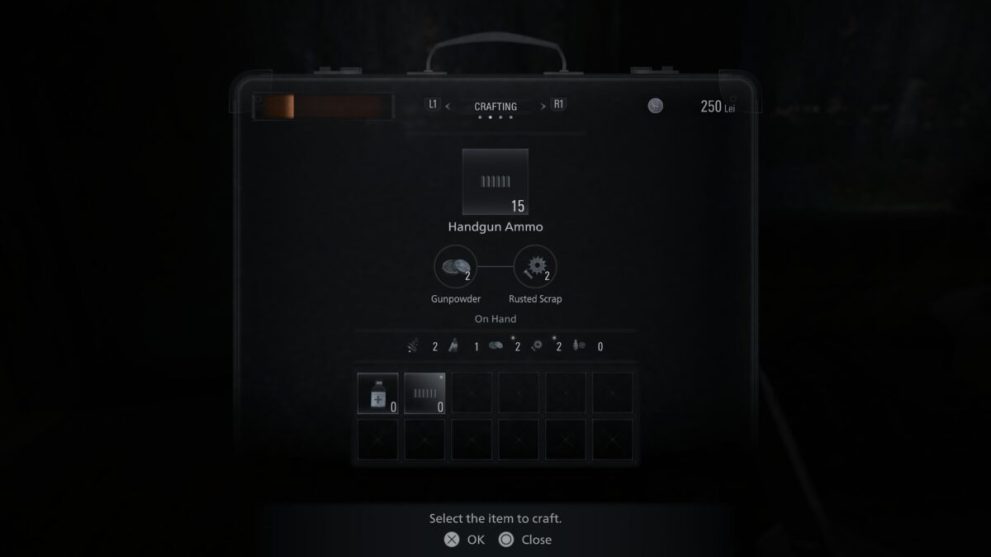
First, you need to make sure you actually have enough resources to craft items. For instance, mixing chem fluid with an herb will allow you to create a first aid med. Press the triangle or Y button to bring up your menu, then press R1 or RB to tab over to the crafting menu.

From here, use the d-pad to select the item you want to craft, then press the X or A button to confirm your selection. The crafted item will then get added to your inventory automatically. At the start of the game, you’ll only be able to craft basic items like first aid meds and handgun ammo. However, if you’ve got the cash, you can buy new crafting recipes from the Duke and craft your own shotgun shells and mines.
It’s possible to scavenge ammo and healing items while exploring, but being able to craft your own stuff on the go is always useful.
That’s all you need to know about how to craft items in Resident Evil Village. Be sure to check our guide wiki for more tips and information on the game.
