Every once in a while, when there’s a minor or major update coming to World of Warcraft (WoW), Blizzard will allow players to check it out ahead of its release in a Public Test Realm (PTR). In this guide, we’ll talk you through how to get a WoW Public Test Realm account, so you can check it out for yourself.
Getting a World of Warcraft PTR Account
Before you can do anything else, you’ll need to make sure you have a World of Warcraft PTR account.
To get a PTR account, you must have a standard game account for World of Warcraft. It cannot be a Starter Edition account. Your account must also be active. In other words, it must have some game-time on it either via a prepaid card or monthly subscription fee. You can check your account type and status here.
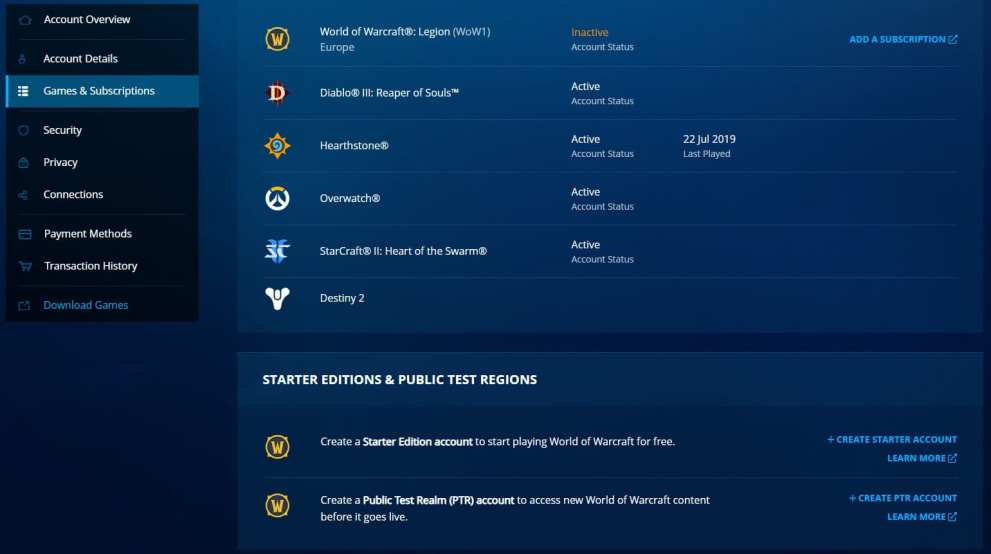
Once you’ve got a standard, active World of Warcraft account, login to your account at Blizzard.com and go to ‘Games and Subcriptions’ on the left-hand side. At the bottom of this screen, you’ll see the option to ‘Create a Public Test Realm (PTR) account to access new World of Warcraft content before it goes live.’

Select the ‘Create PTR Account’ just to the right of it, and follow the steps to complete the process.
Downloading & Accessing the World of Warcraft PTR
To install the World of Warcraft Public Test Realm, open up your Blizzard Battle.net app, and follow the below steps:
- Select ‘World of Warcraft’
- Above the Play button, select ‘Public Test Realm’ from the dropdown options.
- Click the ‘Install’ button which replaces ‘Play.’
- Wait for the download to complete, and then select ‘Play’ to being playing the WoW PTR.
If you’re having any issues downloading the WoW PTR, or setting up your Public Test Realm account, be sure to check Blizzard’s support pages.
That’s everything you need to know to play the WoW PTR. For more tips, tricks, and guides on the game, be sure to check out more of our coverage below.
