The Nook Inc desert island getaway package has arrived and players in Animal Crossing New Horizons are building up their dream islands. Every house needs a yard and every yard needs a fence. Here is everything you need to know about how to build fences in Animal Crossing New Horizons.
How to Build Fences in Animal Crossing New Horizons
In order to build fences, you’ll have to complete the task of building three houses for new villagers coming to your island.
Tom Nook will tell you that three new villagers have decided to join the island after you build both the museum and the new Nook’s Cranny shop. After crafting the required items for their homes Tom Nook will reward you with fifty pieces of wooden fence.

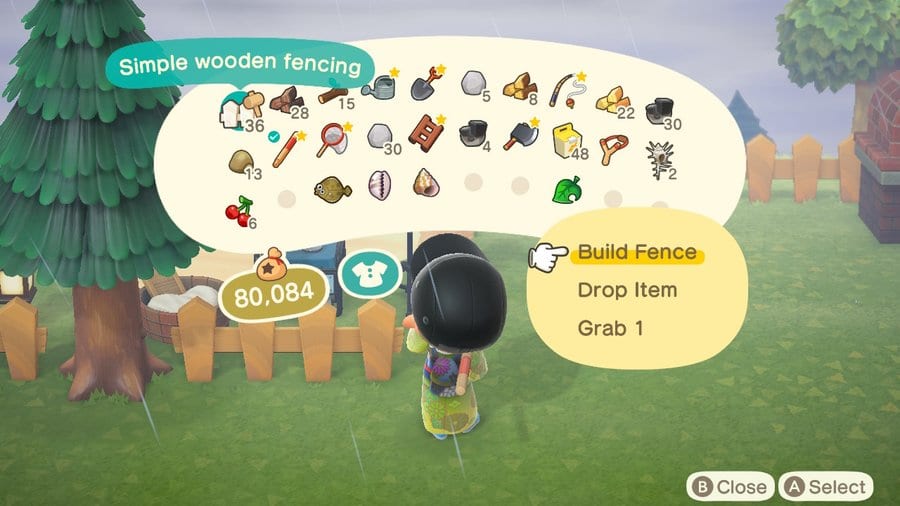
In order to use this fence, all you have to do is open your inventory, select build fence and your villager will equip a little hammer. Once it’s equipped just hit the A button to drop a section of fencing down.
All fencing will connect together if they are placed next to each other. If you misplace a piece you can simply pick it up with the Y button and try again.
You can purchase more fencing from Nook’s Cranny anytime. They will also offer some additional fencing patterns to suit your styling needs.
Time needed: 6 days
Here is a quick recap of how to build fences in Animal Crossing New Horizons:
- Complete Nook’s Requests
You’ll need to build the museum, shop, and three villager’s houses before Nook gives you fencing.
- Open your inventory
Once you have the fencing just open your inventory and select the fencing.
- Place fences
Place your fencing with the A button.
Well, that’s everything you need to know about how to build fences in Animal Crossing New Horizons. For more tips, tricks, and guides be sure to check out our extensive Animal Crossing New Horizons Wiki, or just search Twinfinite.
